
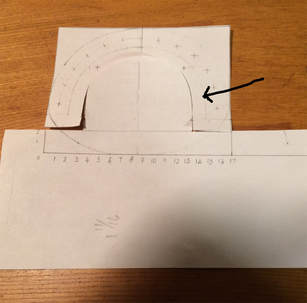
 The gutter is the break line between the flat rear area and the carved out sitting area. Another photocopy. The arrow points to a, very feint, gutter line. Inside of that I've drawn another line 1/2" inside of it. 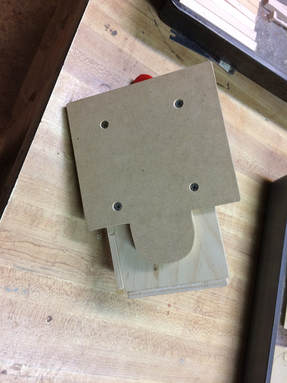 Cut and trace that curve onto, in this case, 3/8" MDF, and then bandsaw the shape. 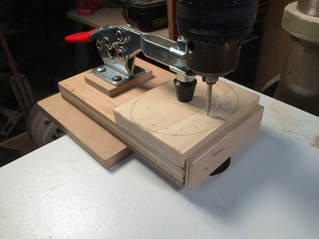 Attach it to the underside of a piece of 3/4" plywood that is the exact width of the seat blank. Add a side and end fence to make it easy to locate the blanks in their correct location. Finally add a De-Sta-Co style clamp (mine is from Harbor Freight) to hold the blank in place while routing the gutter 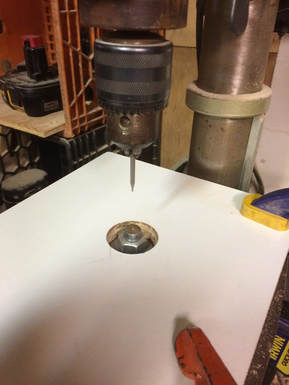 Why 1/4" at the first photo? I have located a 1/2" rod on my drill press. The holding jig will rub along this rod, while the 1mm Dremel cutter, at the highest drill press speed, routes out the gutter. The quill had been lowered to the correct depth. 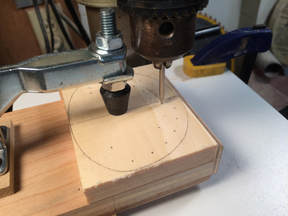 Making the holding/routing jig and setting it up on the drill press took two and a half hours, with interuptions. Routing and sanding the gutter took one hour. I realized early on with my first miniature chair, that development time could not be included in the final price if the price was to be kept within reason. So I rationalize by think of jig/development time as my hobby, and only production time contributes to the selling price.
0 Comments
Leave a Reply. |
Archives
May 2019
Categories |
 RSS Feed
