
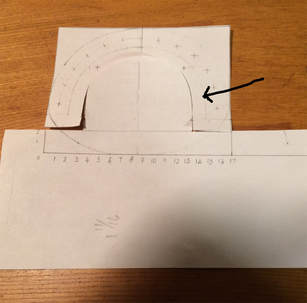
 The gutter is the break line between the flat rear area and the carved out sitting area. Another photocopy. The arrow points to a, very feint, gutter line. Inside of that I've drawn another line 1/2" inside of it. 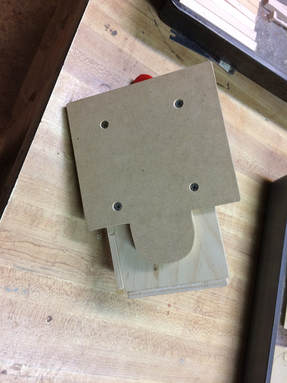 Cut and trace that curve onto, in this case, 3/8" MDF, and then bandsaw the shape. 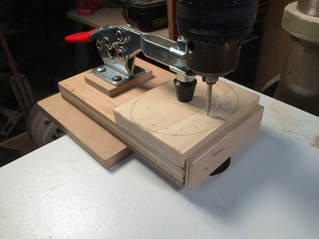 Attach it to the underside of a piece of 3/4" plywood that is the exact width of the seat blank. Add a side and end fence to make it easy to locate the blanks in their correct location. Finally add a De-Sta-Co style clamp (mine is from Harbor Freight) to hold the blank in place while routing the gutter 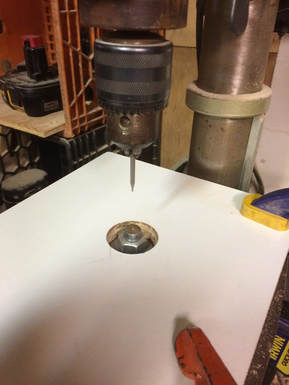 Why 1/4" at the first photo? I have located a 1/2" rod on my drill press. The holding jig will rub along this rod, while the 1mm Dremel cutter, at the highest drill press speed, routes out the gutter. The quill had been lowered to the correct depth. 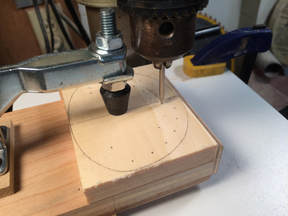 Making the holding/routing jig and setting it up on the drill press took two and a half hours, with interuptions. Routing and sanding the gutter took one hour. I realized early on with my first miniature chair, that development time could not be included in the final price if the price was to be kept within reason. So I rationalize by think of jig/development time as my hobby, and only production time contributes to the selling price.
0 Comments
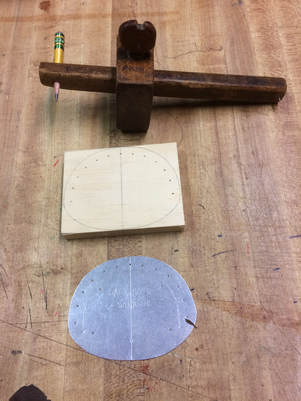 I cut seat blanks to 3-1/2" x 2-3/4" x 3/8". The pine I had yielded 32 pieces. I'm aiming for 20 good seats so this will give me leeway. Some of them will be used up during the gutter routing process - more on this later. A center line is added, and then the template can be used to draw the perimeter and the locations of all of the holes to be drilled except for the leg holes - again, more on this later.  The seat template never comes out symmetrical. Drawing, eyesight, transferring from paper to metal, and finally cutting the metal creates many opportunities for inaccuracies, and I seem to take at least some of those opportunities. Not to worry though, I lay the template on the wood, center line to center line and mark out one side of the center line, flip the template over and repeat for the other side. 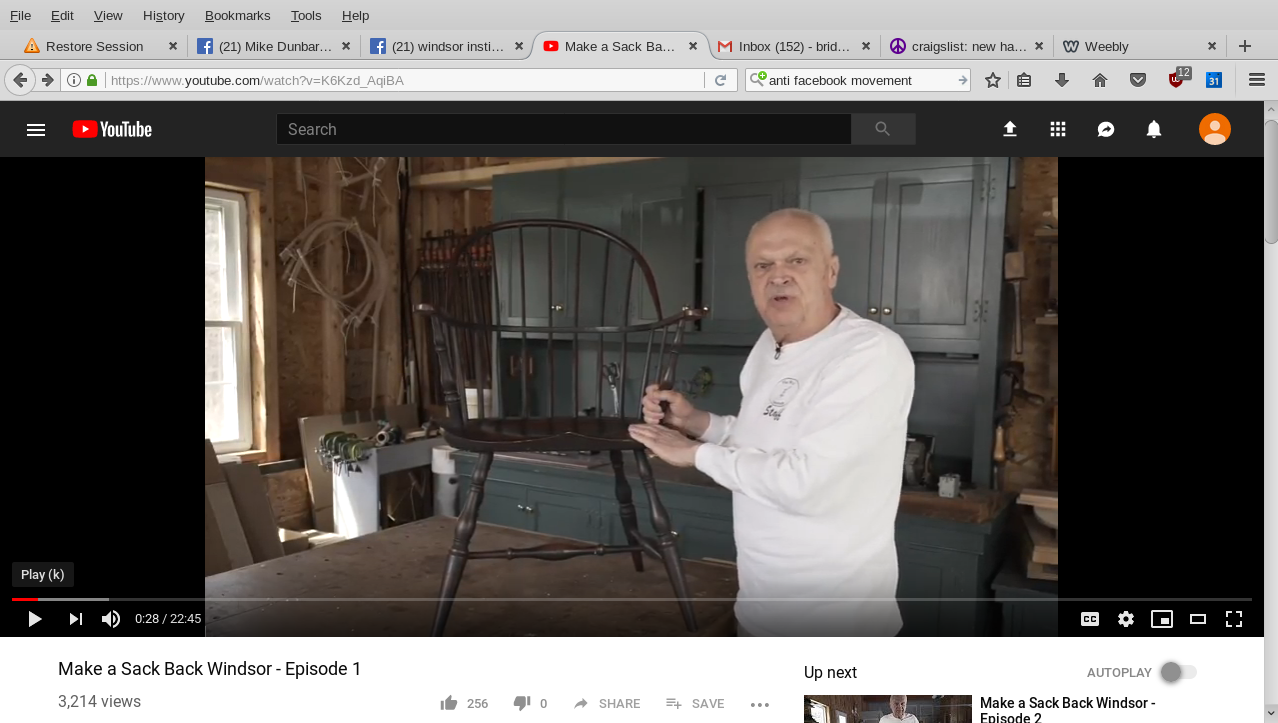 After my last post I got to thinking that maybe I should ask Mike if it was OK to use his name and experience in public to further my work, so I tracked him down to ask for absolution. I knew that he had stopped his Windsor chair building classes, but wasn't aware that he was now producing wonderful free videos of the whole process of making, by coincidence, a sack-back Windsor.
The screenshot above is from his introduction to his first video. Check them out - www.youtube.com/watch?v=K6Kzd_AqiBA 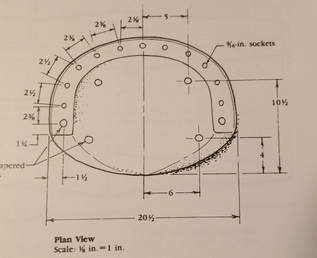 This is the seat drawing from Mike Dunbar's book. 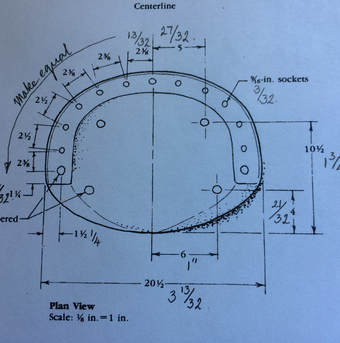 Scale measurements added. 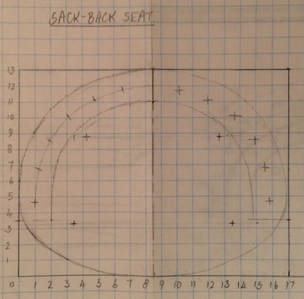 My graph paper, at 17 squares, was exactly 3-13/32", and the depth of the seat at 2-19/32" was exactly 13 squares. 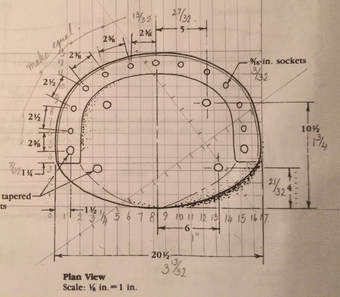 So, I made a 17 x 13 square grid on the copy with the scale measurements. 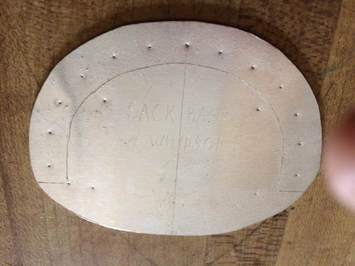 I laid this drawing onto a piece of aluminum flashing and transferred the shape and drilling points. It is important to mark the center line as it will be used for aligning this template correctly on the wood when marking out. 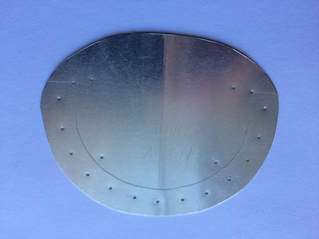 And finally I drilled a small hole where spindles and legs will go. I used a #60 drill bit. 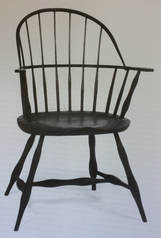 Last week I started on my next miniature chair, which is to be the sack-back, or double bow, Windsor. I have six books, plus a web download, of sack-back working drawings, some with just the scaled drawings and some with text that describes to a greater or lesser extent the process of making full size chairs using traditional tools and methods. Which should I use?  Spreading out the seven variations I see that they are all very similar except that each of the authors, all of whom are/were themselves chair makers, made their chairs based on models from different times and places in the USA. One difference stood out, however : some of the chairs had baluster turnings (the leftmost of the two shapes), and some had later, 1780s, bamboo style turnings (the other one), which is what I went for. I decided to use Mike Dunbar's book Make a Windsor Chair. Mike, who I only know through his writing, is a long time teacher and maker of Windsor chairs
Sources of Sack-back Windsor Chair Working Drawings -Make a Windsor Chair - Mike Dunbar - Popular Woodworking Books,2013 -Windsor Chairmaking - James Mursell - The Crowood Press, 2015 -Classic American Furniture - Time Life, -Measured Drawings of 18th Century American Furniture - Ejner Handberg - Countryman Press,1993 -The Chairmaker's Workshop - Drew Langsner - Lark Books,2001 -Chairmaking Simplified - Kerry Pierce - Popular Woodworking Books,2008 -The Book of American Windsor Furniture - University of Massachusetts Press,1998 -A Classic Windsor Chair - Woodarchivist.com |
Archives
May 2019
Categories |
 RSS Feed
